
- Introduction
- Testing with Cypress
- Testing with the Command Line
- Delays, timing and waiting
- Activities
- Lesson Task
- Additional resources
Introduction
The purpose of e2e testing is to simulate the experience of a real world end user as they traverse a web application. Unlike unit tests, which require only a single atom of an application to run, e2e tests are holistic meaning that they require the entire application to be running before they can be used. This form of testing uses a similar syntax and tone, but the aim is quite different.
Since an e2e test is effectively playing out real actions on a live webpage, we can watch this process in real time as the software takes control of our browser. For many developers new to testing, this can provide useful visual feedback on how the test run is performing.
Testing with Cypress
In this lesson we will test an existing web application with Cypress, a popular e2e testing framework. Cypress is a JavaScript based framework that runs in the browser and is designed to be easy to use and understand.
Installing Cypress
Make sure that you have a git repository and
package.jsonfile ready in your project folder, usinggit initandnpm initas necessary.
Make sure to setup a
.gitignorefile with/node_modulesignored before proceeding.
To begin working with Cypress, we must first install it with the command:
npm i -D cypress eslint-plugin-cypress
Commit this change to your repository.
If you do not have eslint installed and configured already, run this command and answer the questions accordingly:
npx eslint --init
✔ How would you like to use ESLint? · problems
✔ What type of modules does your project use? · esm
✔ Which framework does your project use? · none
✔ Does your project use TypeScript? · No / Yes
✔ Where does your code run? · browser
✔ What format do you want your config file to be in? · JSON
Local ESLint installation not found.
The config that youve selected requires the following dependencies:

eslint@latest
✔ Would you like to install them now? · No / Yes
✔ Which package manager do you want to use? · npm
The result will be a file like this:
{
    "env": {
        "browser": true,
        "es2021": true
    },
    "extends": "eslint:recommended",
    "overrides": [
    ],
    "parserOptions": {
        "ecmaVersion": "latest",
        "sourceType": "module"
    },
    "rules": {
    }
}
Now we should update .eslintrc.json with configuration data for linting Cypress tests:
{
  "env": {
    "browser": true,
    "es2021": true,
    "node": true
  },
  "extends": "eslint:recommended",
  "overrides": [
    {
      "files": ["**/*.cy.js"],
      "env": { "cypress/globals": true },
      "plugins": ["cypress"],
      "extends": ["plugin:cypress/recommended"],
      "rules": {
        "cypress/no-unnecessary-waiting": "off",
        "no-unused-vars": "off"
      }
    }
  ],
  "parserOptions": {
    "ecmaVersion": "latest",
    "sourceType": "module"
  }
}
Save and commit this change.
Next, add a new script to your package.json file:
{
  "scripts": {
    "test": "npm run test-e2e",
    "test-e2e": "cypress open"
This command npm run test-e2e will open Cypress for the first time in a new window:
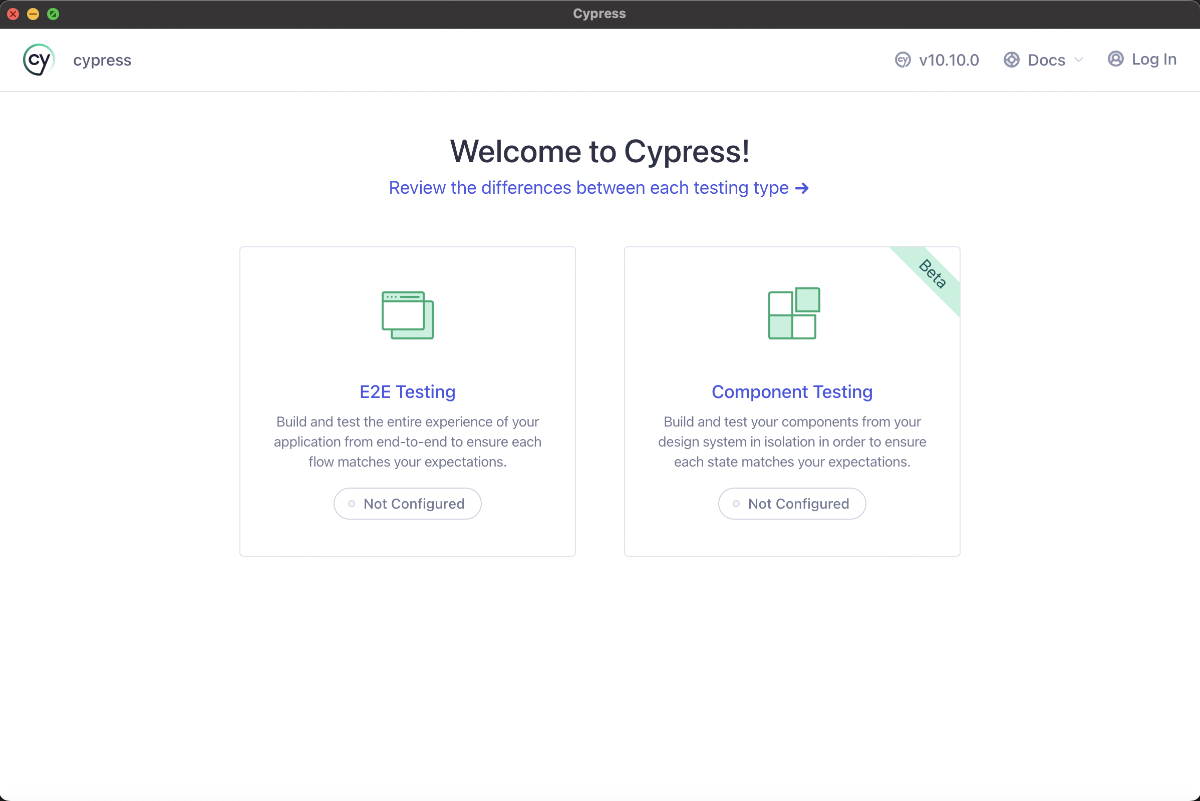
Select E2E Testing to continue.
Configuring Cypress
Next Cypress will install configuration data into your project in the file cypress.config.js along with some other files required to run tests.

Click on Continue and you will be prompted to select a browser for Cypress to use:
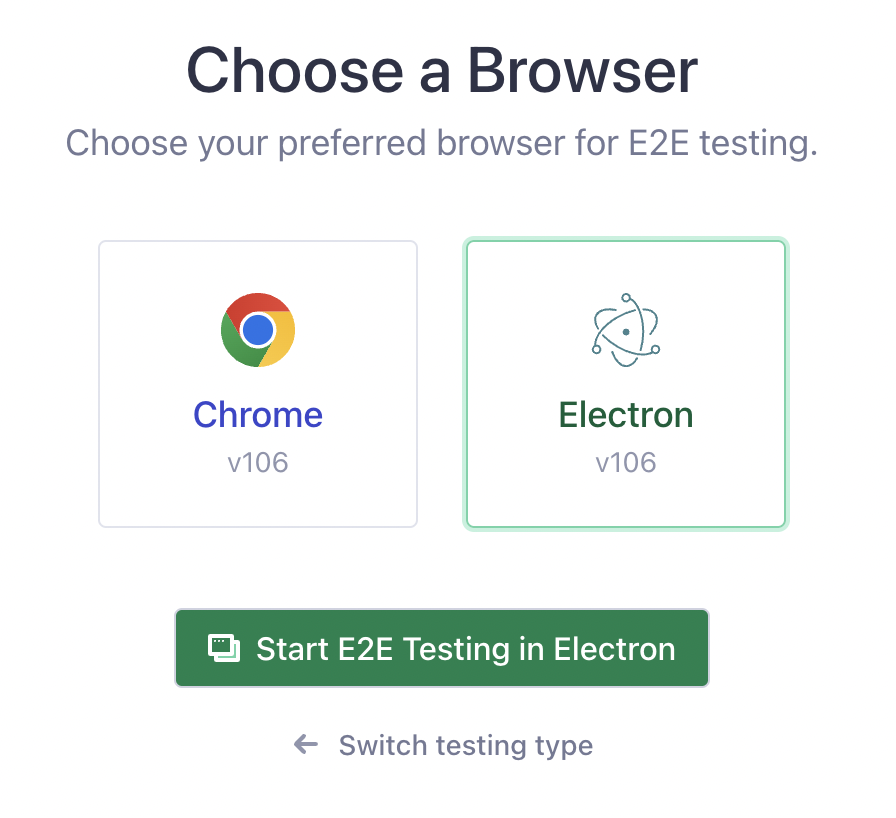
Select Electron and click Start E2E Testing in Electron.
Cypress Dashboard
After completing the steps above, you will see an empty dashboard:
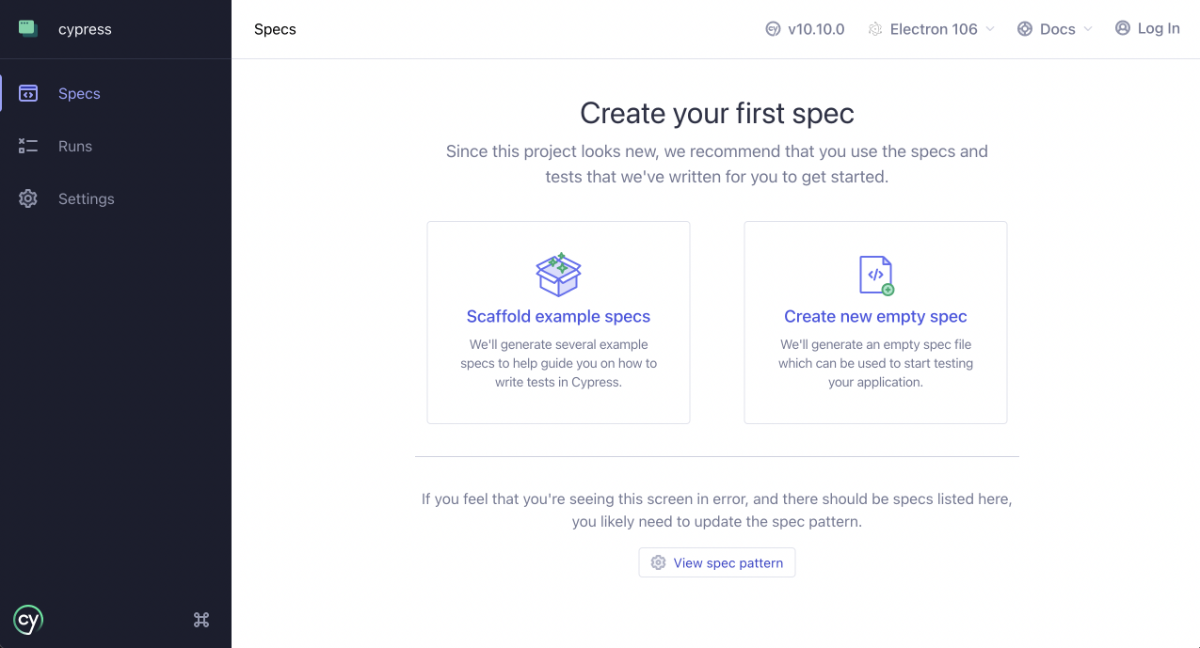
Let’s install some example tests to get started by clicking on Scaffold example specs.
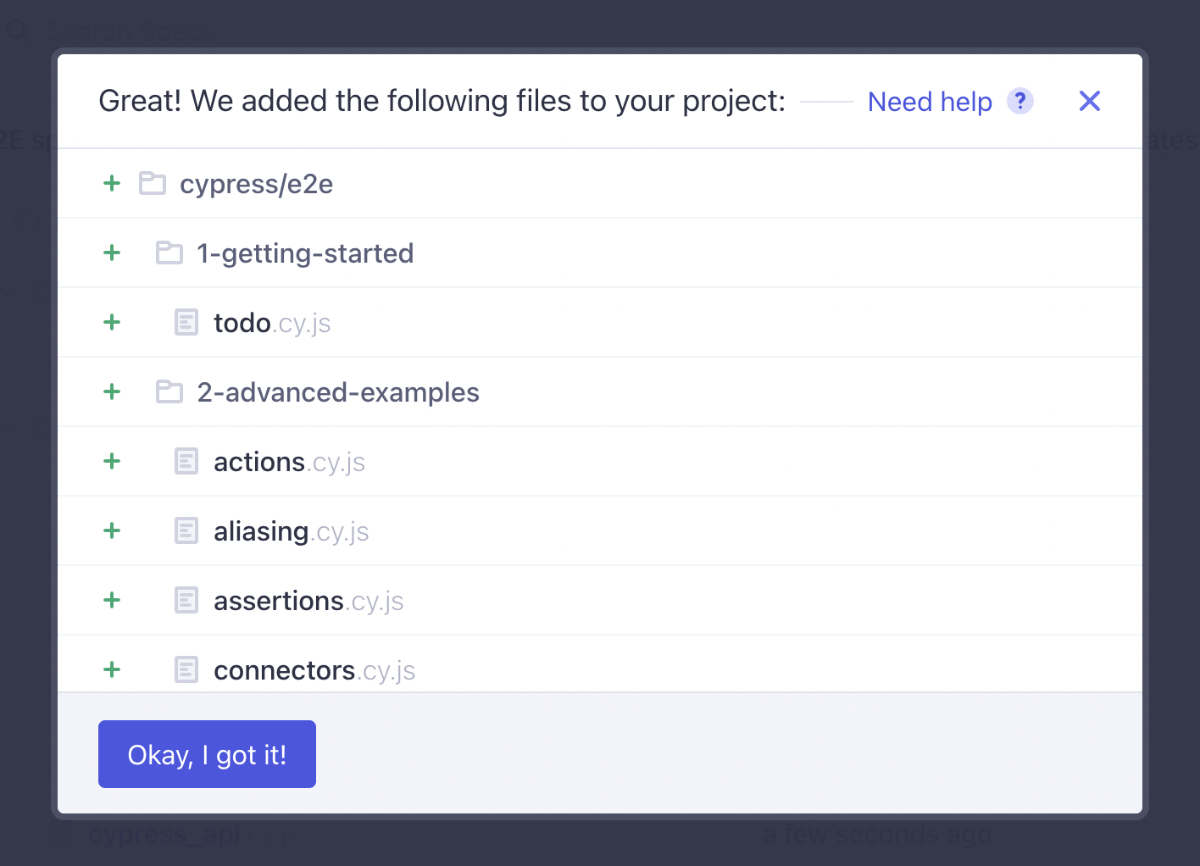
This will create new files and folders containing useful predefined examples of how to write and run tests in Cypress:

Cypress is now fully configured and ready for use.
Running Tests
To start off with, let’s run one of these example tests that we installed. In the dashboard, click on todo and watch the test run proceed.
This test will complete quite quickly, so feel free to run it a few times in case you blinked the first time. You can rerun a test by clicking the refresh icon labelled Run all specs.
Inspect this test result by clicking on each of the steps. As you hover over each step Cypress will replay the action again so that you can see the state of the application at the time that it was tested on each criteria.
Once you have spent some time running each of the scaffold tests, take a look through the corresponding folder: cypress/e2e.
Writing Tests
The syntax used in Cypress test files bears some similarity with other testing frameworks, such as Jest. For each test case, we describe the expected outcome with it assertions. It is important to remember that the scope of these assertions is different in e2e testing than unit testing. In unit tests we are interested in the functionality of a single function, whereas in e2e tests we are interested in a particular user workflow, for example, adding a product to the cart and checking out.
Since there is more complexity involved with this process, Cypress has a larger library of matchers that can be used to make many assertions about a web page.
By now, you should have a cypress folder in the root folder. Lets write a simple cypress test using the no.wikipedia homepage. Do the following:
- Open the e2e folder in the
cypressfolder - Create a folder with name
3-testing. - Create a file with name
no.wikipedia.cy.js
describe("no.wikipedia.org", () => {
  it("can search for Noroff", () => {
    cy.visit("https://no.wikipedia.org");
    cy.get("input#searchInput").type("Noroff{enter}", { delay: 500 });
    cy.get('h1').contains("Noroff")
  })
})
Save and commit this file and locate it in your Cypress dashboard. Note that Cypress will automatically detect new test files and display them in this dashboard. Click on your new test to see it working!
Testing with the Command Line
Although it is enjoyable to watch Cypress tests run in real time on a browser, this is not always practical. While we will always have a browser to hand on our own computers, we may want to test our repository on a server. A server does not have a visual output, so we must find a way to run the same tests on the command line for this purpose.
In your package.json file, add a new script:
{
  "scripts": {
    "test": "npm run test-e2e-cli",
    "test-e2e": "cypress open",
    "test-e2e-report": "cypress run --reporter mochawesome",
    "test-e2e-cli": "cypress run"
Now run this script from the command line: npm run test-e2e-cli.
You will see the same test suite running in your VS Code or terminal window, providing a summary of the results as they progress.
Save and commit this file.
Delays, timing and waiting
When writing regular code, or unit tests, we are used to our code executing promptly and in a predictable order. We can use the await or .then syntaxes to manage events that are long-running, especially when we cannot predict exactly how long they will take to complete – for example, an API request. When using this syntax correctly, we can avoid timing issues in most cases.
In the context of e2e testing we do not have this luxury. As we are simulating a real-world user, we cannot peek into the code and pick out a function to await. If a function takes 30 seconds to complete – we must do what the user would do in this situation. We must be patient.
Furthermore, modern applications frequently use animations and transitions to express content. These animations necessarily take place over time, an animation may take as little as 100ms or as long as 5 seconds to complete before an element is accessible on screen. These animations are usually controlled with CSS rather than JavaScript, meaning that even if we had access to their code we would not have an easy way to await their completion.
Intercepts
Cypress offers us a way to intercept an HTTP request and cy.wait() for it to complete. This is useful in situations like creating, updating or deleting an item within an app where we must wait for the response before continuing onto the next view of the application:
// Select an API route to hook onto and provide an alias
cy.intercept('https://api.com/examples').as('exampleList');

// Visit the page we need to test
cy.visit('/examples.html');

// Wait for the targetted API request to complete
cy.wait('@exampleList');

// Make assertions about the page
cy.get('ul.examples > li').should('have.length', 3);
Delays
In some cases, we may not have access to the API request that we need to wait for. In these cases, we can use the cy.wait() function to wait for a specified amount of time before continuing. While this can be a quick way to solve a frustrating problem, it can also create problems of it’s own. Using this approach can lead to a lot of time spent tuning the delay instead of concentrating on the more important logic of the test itself. In general we should attempt to intercept before falling back to this approach:
// Visit the page we need to test
cy.visit('/examples.html');

// Wait for 5 seconds
cy.wait(5000);

// Make assertions about the page
cy.get('ul.examples > li').should('have.length', 3);
Changing the default timeout
In some cases, we may need to wait for a longer period of time than the default timeout of 4 seconds. We can change this default timeout by setting the defaultCommandTimeout property in our cypress.json file:
{
  "defaultCommandTimeout": 10000
}
In general, this should not be necessary if we are using cy.intercept() to wait for API requests to complete. However, if an application uses particularly long animations, or we are testing on a slow internet connection, for example, we may need to extend this timeout to allow our tests to complete.
Activities
- Watch: Cypress in a Nutshell
Lesson Task
Choose one of your existing projects and write a list of test case for your app. For example, an e-commerce application should test it’s Add to Cart, Remove from Cart and Checkout flows.
Write at least three e2e tests for this application and run them in the browser and CLI.
Additional resources
